Google Maps Error 610 Bad Key, Responsive HTML5 Google Map API V3


Getting a 610 error response from Google lately? Perhaps you have a bad API key? Not really it actually might be because Google deprecated support for their API V2…


Want to learn how to make a responsive google map for your site using PHP & HTML5 on API 3? here is how…


Note: In API V3 you do not require or use an api key.


Objectives:
Create a quick solution to produce responsive HTML5 Google Maps on the fly.

  1. write HTML
  2. write CSS
  3. write php/curl function
  4. example of use
  5. sample

First we will begin with a quick HTML wrapper and to place our iframe in…

[cc lang=”html”]

[/cc]


Use CSS to control the iframe and wrapper, this will also keep iframe in widescreen/16:9

[cc lang=”css”]

.wrapper

{
height: 0;
padding-bottom: 56.25%; /* 16: 9 */
position: relative;
width: 100%;
margin: 0;
overflow: hidden;
}
iframe

{
height: 100%;
left: 0;
position: absolute;
top: 0;
width: 100%;
border: 0;
overflow: hidden;
}

[/cc]


Now lets create the function that will generate a iframe tag on the fly by simply passing 1 value… an address
[cc lang=”php”]
# google map iframe generation
function gMap($a)
{
// setting up vars
$lat = ”;
$lon = ”;
$addr = $a;
$addr = urlencode($addr);
$u=”http://maps.googleapis.com/maps/api/geocode/json?address=”.$addr.”&sensor=false”; // URL
$ch = curl_init();
curl_setopt($ch, CURLOPT_URL, $u);
curl_setopt($ch, CURLOPT_HEADER,0);
curl_setopt($ch, CURLOPT_USERAGENT, $_SERVER[“HTTP_USER_AGENT”]);
// Comment out the line below if you receive an error on certain hosts that have security restrictions
curl_setopt($ch, CURLOPT_FOLLOWLOCATION, 1);
curl_setopt($ch, CURLOPT_RETURNTRANSFER, 1);
$d = curl_exec($ch);
curl_close($ch);
$g = json_decode($d, true);
// Debugging Purposes… or if you wanna use additional data…
//echo ‘

';
//print_r($g);
//echo '

‘;
// If the Json request was successful…
if ($g)
{
$lat = $g[‘results’][0][‘geometry’][‘location’][‘lat’];
$lon = $g[‘results’][0][‘geometry’][‘location’][‘lng’];
$m = ‘‘;
echo $m;
} else {
echo ”

No Map Available

“;
}
}
[/cc]


Our php then goes inside the div
[cc lang=”php”]

< ?php // you can insert a var instead of string if you wish ex: gMap($address) gMap('48034 Rancho Way Temecula CA, 92592'); ?>

[/cc]


An example of a running script
[cc lang=”php”]
< ?php # google map iframe generation function gMap($a) { // setting up vars $lat = ''; $lon = ''; $addr = $a; $addr = urlencode($addr); $u="http://maps.googleapis.com/maps/api/geocode/json?address=".$addr."&sensor=false"; // URL $ch = curl_init(); curl_setopt($ch, CURLOPT_URL, $u); curl_setopt($ch, CURLOPT_HEADER,0); curl_setopt($ch, CURLOPT_USERAGENT, $_SERVER["HTTP_USER_AGENT"]); // Comment out the line below if you receive an error on certain hosts that have security restrictions curl_setopt($ch, CURLOPT_FOLLOWLOCATION, 1); curl_setopt($ch, CURLOPT_RETURNTRANSFER, 1); $d = curl_exec($ch); curl_close($ch); $g = json_decode($d, true); // Debugging Purposes... or if you wanna use additional data... //echo '

‘;
//print_r($g);
//echo
;
// If the Json request was successful…

if ($g)
{
$lat = $g[‘results’][0][‘geometry’][‘location’][‘lat’];
$lon = $g[‘results’][0][‘geometry’][‘location’][‘lng’];
$m = ‘‘;
echo $m;
} else {
echo ”

No Map Available

“;
}
}

?>

< ?php // you can insert a var instead of string if you wish ex: gMap($address) gMap('48034 Rancho Way Temecula CA, 92592'); ?>

[/cc]

Let me know if you have any questions. :)

Installing And Securing phpmyadmin In Ubuntu Server 12.04/12.04.2

This post is important because phpmyadmin no longer just works after apt-get install, it requires additional steps to get working.
Aside from these changes, due to recent reports on phpmyadmin being exploited it’s important to secure it, you can do this in a couple of ways but I am going to assume you want access to it via web.

2 Parts

  1. Installation of phpmyadmin
  2. Securing the installation via htaccess
  3. Discussing more secure methods of accessing phpmyadmin


Lets begin the install muahahaha…


Enter root mode:

sudo bash


Install:

apt-get install phpmyadmin


Open Apache Config File

vim /etc/apache2/apache2.conf


Insert the following line at the very bottom of apache2.conf

Include /etc/phpmyadmin/apache.conf


Restart Apache server:

service apache2 restart


Securing phpmyadmin from public access to web panel…


Edit phpmyadmin’s apache configuration file:

vim /etc/phpmyadmin/apache.conf


Under the directory section (<Directory /usr/share/phpmyadmin>), add the line “AllowOverride All” under “Directory Index”:

        <Directory /usr/share/phpmyadmin>
        Options FollowSymLinks
        DirectoryIndex index.php
        AllowOverride All


create .htaccess file in phpmyadmin’s root directory:

vim /usr/share/phpmyadmin/.htaccess

Copy the following into the newly created .htaccess file:

AuthType Basic
AuthName "Restricted Files"
AuthUserFile /var/.htpasswd (make sure you set this path to a secure place outside your web root)
Require valid-user


Generate the password file where passwords will be stored for authentication/access to phpmyadmin root

htpasswd -c  /var/.htpasswd username (username should be your username, you will be asked for your password once you execute the command)


Restart Apache so updates can take effect:

service apache2 restart


If you want this to be more secure then I would suggest rethinking your server/network architecture…

  1. seperate your apache and mysql services into their own box
  2. only have apache server open on port 80 (public) and have it talk to your mysql server locally.
  3. if you need to change something in your database or need to access phpmyadmin I would vpn into your local network and access the mysql/phpmyadmin box.

If you have any questions or comments use the section below :)

iPhone HTML 5 App Mode jQuery Undefined URL Link Error…

So I figured I would write a post about this because I could not find any information regarding this type of error except lots of confusion on multiple forums, hopefully this post will shed some light on the error and will help you fix yours :)

If you are developing HTML 5 Apps for mobile devices and are using jQuery you are most likely going to run in a few errors which you’re going to have to debug. In this case I am going to talk about an error inside Full Screen mode (App mode) for the iPhone which takes you to an “undefined URL” error page when clicking on a link…

image

When using using <a href> links in APP mode you have 2 issues:

  • App Mode Minimizes and opens up Safari to open the selected page
  • You get an undefined URL Page Error

If you’re having problems like the first error description (closing app mode and opening safari when clicking page links) you are going to want to use some jquery to handle the loading of the link internally, this can be done with the following line of code:

[cc lang=jquery]
$( document ).on(“click”, “a”, function( event ){

event.preventDefault(); location.href = $( event.target ).attr( “href” );

});
[/cc]

But what if you are using <a> links without a “href” attribute as triggers for slide effects in jquery? This will give you an “underfined URL” error page. In my case it was due the code above, because jQuery was looking for an href attribute that was not present inside the <a> element and was not able to “define” a valid URL. To fix this I rewrote my script in order to first check if the <a> element had a “href” attribute, if it did then proceed with the internal loading, If not then prevent the default behavior of the <a> element, after all I was simply using an “<a>” (<a class=””></a>) element as a trigger to slide in and out a sub menu. To fix this and control both “href” and non href links use the following code:

[cc lang=jquery]

$( document ).on(“click”, “a”, function( event ){

if($( event.target ).attr( “href” ))
{

event.preventDefault(); location.href = $( event.target ).attr( “href” );

}
else
{

event.preventDefault();

}

});

[/cc]

This will allow you to use <a> elements as triggers and regular internal links without sending you to an undefined URL error page. Anyways I hope this helps :)
If you need further assistance use the comment functionality on this post.

Regards,

PHP Startup: Unable to load dynamic library ‘/usr/lib/php5/20090626/mcrypt.so’ – libmcrypt.so.4: cannot open shared object file: No such file or directory in Unknown on line 0

Ok so I decided to quickly make this post because it was such a bitch to figure this out, all the information regarding missing dynamic libraries are in many cases unclear and could not find anything specific on the mcrypt library.

if you get the:
PHP Startup: Unable to load dynamic library ‘/usr/lib/php5/20090626/mcrypt.so’ – libmcrypt.so.4: cannot open shared object file: No such file or directory in Unknown on line 0

Here is whats going on…
you are missing files that are part of Apaches/PHP’s resources or you php.ini has the “entension_dir” value duplicated/actively pointing to the wrong location or php-cli is using the wrong php.ini config file. In my case it was due to a glitch with Ubuntu servers live OS update to 12.04.1 LTS which removed the old libraries and never re-installed them as part of the update.
Here is the checklist that will save you a long-ass headache, one that I unfortunately went through…

1) check your php.ini and make sure your “extension_dir” value (typically between line 805-809) is nulled out so its not processed (usually has a ; in front of it) in some cases the php.ini can be in multiple locations for apache/php-cli etc…
2) your mcrypt.so library is missing or corrupt.

first lets remove any possible installations of mcrypt libraries by running this in a shell, if you don’t have it installed skip this step (or you can still do it and if its not installed it will do nothing)…

sudo apt-get remove php5-mcrypt
sudo apt-get purge php5-mcrypt

then run this in a shell…

apt-get install php5-mcrypt
/etc/init.d/apache2 restart
(or you can sudo reboot too ;))

once this is done you should no longer get this error. If you have any issues please leave me a comment below :)

How to Remove LiveZilla’s Footer/Credits From Version 3.3.2.2

This is a sequal to my former livezilla post, How to Remove LiveZilla’s Footer/Credits. In this post I will cover some simple changes to the version 3.3.2.2. I decided to cover this version because it was the last open source version before they went corporate… The objectives will remain the same:

  • remove all Open Source branding…
  • edit the carrier_logo.gif image to represent you company’s brand/logo
  • change the livezilla header breadcrumb
  • change footer code that shows LiveZilla Credits

If you haven’t already figured out to install the livezilla server files in a folder called live-chat or live-support. Do it now, its SEO friendly :) Once you have installed your server files make sure they are located one level up of your root directory (root:/live-chat/) this will make everything look more professional in the long run. Once the steps above have been completed locate the file named lz_chat_frame.4.1.tpl this file should be located at: root:/live_chat/templates/frames/ once located the file should look similar to this: lz_chat_frame.4.1.tpl


<!DOCTYPE HTML PUBLIC “-//W3C//DTD HTML 4.01 Transitional//EN”>

<html>
<head>
<META NAME=”robots” CONTENT=”index,follow”>
<title><!–config_gl_site_name–></title>
<link rel=”stylesheet” type=”text/css” href=”./templates/style.css”>
</head>
<body topmargin=”0″ leftmargin=”0″>
<div id=”lz_chat_param”><!–param–></div>
</body>
</html>


Remove <!–param–> and repace it with your company name so it looks like the source below. Updated lz_chat_frame.4.1.tpl


<!DOCTYPE HTML PUBLIC “-//W3C//DTD HTML 4.01 Transitional//EN”>

<html>
<head>
<META NAME=”robots” CONTENT=”index,follow”>
<title><!–config_gl_site_name–></title>
<link rel=”stylesheet” type=”text/css” href=”./templates/style.css”>
</head>
<body topmargin=”0″ leftmargin=”0″>

<div id=”lz_chat_param”>www.mywebsite.com</div></body></html>


This takes care of the footer..   Now lets focus on the header…   We need to find the following comment and delete it or replace it with your company brand/name
<!–config_gl_site_name–> You can find these comments in the following template files…

  1. lz_chat_frame.3.2.login.0.0.tpl (Line 13)
  2. lz_chat_frame.3.2.mail.tpl (Line 14)

Now Lets make sure our page title displays the right brand/name We need to find the following comments and remove/replace them with your brand/name
<!–config_gl_site_name–>
You can find these comments in the following template files…

  1. lz_chat_frame.1.1.tpl (Line 5)
  2. lz_chat_frame.3.2.chat.0.0.tpl (Line 5)
  3. lz_chat_frame.3.2.chat.2.0.tpl (Line 5)
  4. lz_chat_frame.3.2.chat.3.0.tpl (Line 5)
  5. lz_chat_frame.3.2.chat.4.0.tpl (Line 5)
  6. lz_chat_frame.3.2.chat.5.0.tpl (Line 5)
  7. lz_chat_frame.3.2.chat.tpl (Line 6)
  8. lz_chat_frame.3.2.login.0.0.tpl (Line 5)
  9. lz_chat_frame.3.2.login.1.0.tpl (Line 5)
  10. lz_chat_frame.3.2.login.tpl (Line 5)
  11. lz_chat_frame.3.2.mail.tpl (Line 5)
  12. lz_chat_frame.4.1.tpl (Line 5)

After Removing, update files and your good to go! Thats it! Kiss the title, footer and breadcrumb’s gone!


If you have any questions just hit me up below.

Using PHP To Pull Your Last Tweet Via Twitters Atom Timeline

Ok here is a simple script that will help you pull your latest feed from your twitter atom rss timeline without the use of cURL :)

[cc lang=”php”]

# Enter your twitter username
$username = “websymantecs”;

#page title (if you want one >:P)
$prefix = “<h2>Tweet Tweet</h2>”;

# Suffix – some text you want display after your latest tweet. (Same rules as the page title.)
$suffix = “”;

# Our prepared URL
$feed = “http://search.twitter.com/search.atom?q=from:” . $username . “&rpp=1”;

# time to process our request
function parse_feed($feed) {
// time for our data parsing
$phase1 = explode(“<content type=\”html\”>”, $feed);
$phase2 = explode(“</content>”, $phase1[1]);
$tweet = $phase2[0];
$tweet = str_replace(“&lt;”, “<“, $tweet);
$tweet = str_replace(“&gt;”, “>”, $tweet);
$tweet = str_replace(“&quot;”, “”, $tweet);
return $tweet;
}
# Parsed and echo to the screen.
$twitterFeed = file_get_contents($feed);
echo parse_feed($twitterFeed) . stripslashes($suffix);

[/cc]

Its that simple, enjoy! xD!

After a successful feed, you can use CSS to style the returned data.

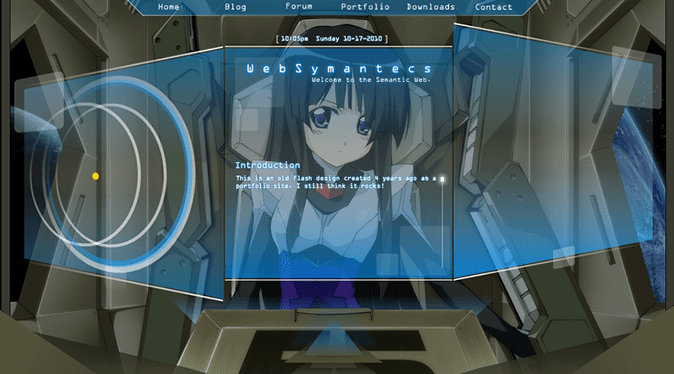
Another Old Flash Design Of Mine :P

This was a sample design I was making to use in a portfolio. Funny when I brought it to an interview the hiring manager had a hard time believing it was my work, too bad for him I had my source files :P Click on the image below to see the flash design. Remember this is almost 4-5 years old, don’t be too harsh :)

2nd Flash Scene Concept Completed For WebSymantecs Information Board.

So yeah, I rarely get time to work my company’s site. I am sure this may be quite normal for people in my profession as we always cater to our clients first :) I will show you a beta scene for complete flash information center that will be implemented soon.

Programs Used So far:

Adobe Fireworks CS5, Photoshop CS5 Extended, Adobe Illustrator CS5, Soundbooth CS5, Flash CS5, Flex 3

What do you think so far?

Old Surf it Local Flash Design, Ahhh The Memories

So I was going through looking for some old video work and I came across this Old Flash Design I made for a HyperLocal Search Engine Project known as Surf it Local. It was a quick and informative site with a countdown to our launch date. I Still think its pretty cool considering I made them in early 2008.

Click here to see the flash site.